As any seasoned clarinet player knows, the quality of the reed significantly affects the sound and playability of the instrument. For professionals, knowing how to adjust reeds is key to getting the best performance. This article covers effective techniques for adjusting clarinet reeds, helping you achieve the best sound in any situation.
Understanding the Anatomy of a Reed
Before adjusting, it's important to know how a reed works. A clarinet reed is a thin piece of cane (or synthetic material) that vibrates when air passes through it, creating sound. The main parts of a reed that impact tone and playability are:
- Heart: The center part of the reed, which affects its strength and flexibility.
- Tip: The thin end that interacts with the mouthpiece, playing a key role in sound production.
- Profile: The thickness and shape of the reed, which influence how it responds to air and player dynamics.
Choosing the Right Reed
Before making adjustments, start with a reed that suits your playing style. Reed strength usually ranges from 1 to 5, with 5 being the stiffest. Professional players often try different strengths and profiles to find what works best with their clarinet and personal style. Knowing how to pick a suitable reed ensures your adjustments will be effective.
Reed Strength Guide
| Strength | Characteristics | Suitable for |
|---|---|---|
| 1 – 2 | Soft, easy to play | Beginners, students |
| 2.5 – 3 | Medium, balanced | Intermediate players |
| 3.5 – 4 | Harder, more control | Advanced players |
| 4.5 – 5 | Very hard, precise control | Professional players |
Common Reed Issues
Reeds can have several problems that need fixing:
- Too Bright or Thin Sound: This can happen if a reed is too stiff or has too much material taken off the tip.
- Muffled Sound: Often caused by a reed that's too thick or not shaped well, blocking good airflow.
- Hard to Articulate: A reed that doesn't respond well might need adjustments to the tip or heart.
Reed Adjustment Techniques
Here's how to adjust your reeds effectively:
1. Shaping the Tip
- Use a very fine sanding tool or knife to gently scrape or sand the reed's tip to the right thickness.
- Be careful not to sand too much; always start with a light touch and check how the reed responds.
- The ideal tip should be thin enough to vibrate freely but thick enough to avoid splitting or wearing out too fast.
2. Adjusting the Heart
- To get a fuller sound, you might need to adjust the heart of the reed.
- Carefully shave down the heart section to make it more flexible, which can give a richer tone.
- Check the switching resistance; the reed should let you articulate easily while keeping a warm sound.
3. Balancing the Reed
- Sometimes, a reed might play unevenly. To fix this, make small adjustments on opposite sides of the reed.
- Check for problems by playing a long note and listening for changes in sound quality.
- Getting the balance right might take some trial and error.
4. Testing and Refining
- After making adjustments, test the reed by playing scales and different dynamic exercises.
- Look for areas that need improvement and ask a trusted musician or teacher for their opinion.
- Keep a detailed record of your reed adjustments, noting what works well and what doesn't over time.
Reed Adjustment Workflow
Tools for Reed Adjustment
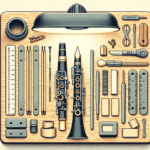
Having the right tools can make a big difference when adjusting reeds. Here are some essential tools:
- Reed Knife: A fine blade for precise control when shaping the reed.
- Sanding Block: Great for smoothing rough edges and adjusting tip thickness.
- Reed Gauge: Useful for measuring the thickness at different points of the reed.
- Pencil: Use it to mark areas before adjusting, helping you track your changes.
Maintaining Your Reeds
Besides adjustments, proper care will help your reeds last longer:
- Keep reeds in a protective case to prevent warping or damage.
- Lightly moisten reeds before playing to ensure they're flexible enough.
- Regularly check for signs of wear or damage so you can fix issues before they affect your performance.
Conclusion
Adjusting your clarinet reeds takes time and practice. By learning how to change the reed's features and keeping consistent, you'll greatly improve your playing. Remember, every player likes different things, so don't be afraid to try new approaches until you find the sound that's perfect for you!
Table of Contents
- Understanding the Anatomy of a Reed
- Choosing the Right Reed
- Common Reed Issues
- Reed Adjustment Techniques
- 1. Shaping the Tip
- 2. Adjusting the Heart
- 3. Balancing the Reed
- 4. Testing and Refining
- Tools for Reed Adjustment
- Maintaining Your Reeds
- Conclusion


